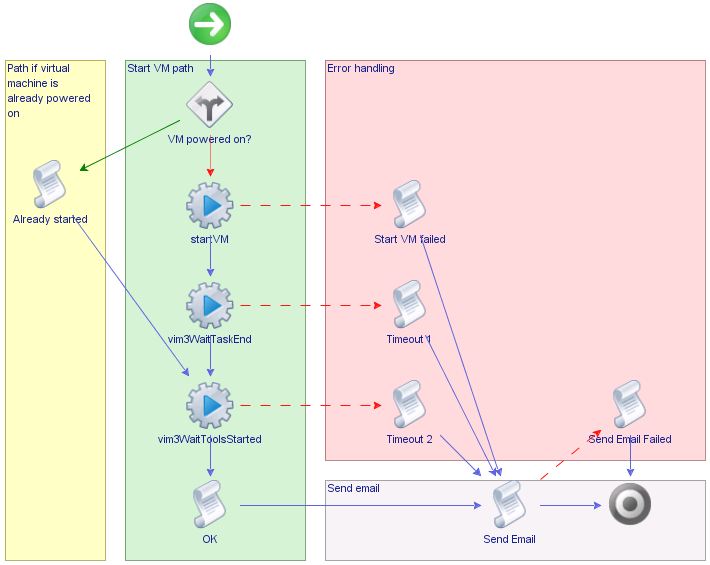
You can emphasize different zones in workflow by adding workflow notes of different colors. Creating different workflow zones helps to make complicated workflow schema easier to read and understand.
Prerequisites
Complete the following tasks.
Procedure
1 | Drag a workflow note element from the Generic menu into the workflow editor. |
2 | Position the workflow note over the Already started scriptable task element. |
3 | Drag the edges of the workflow note to resize it so that it surrounds the Already started scriptable task element. |
4 | Double-click the text and add a description.
For example, Path if virtual machine is already powered on.
|
5 | Press Ctrl+E to select the background color. |
6 | Repeat the preceding steps to highlight other zones in the workflow.
■
|
Place a note over the vertical sequence of elements from the VM powered on? decision element to the OK element. Add the description Start VM path.
|
■
|
Place a note over the startVM failed, both Timeout scriptable task elements and the Send Email Failed scriptable task element. Add the description Error handling.
|
■
|
Place a note over the Send Email scriptable task element. Add the description Send email.
|
|
The following figure shows what the example workflow zones should look like.
Start VM and Send Email Example Workflow Zones

What to do next
You must define the workflow's attributes and input and output parameters.
